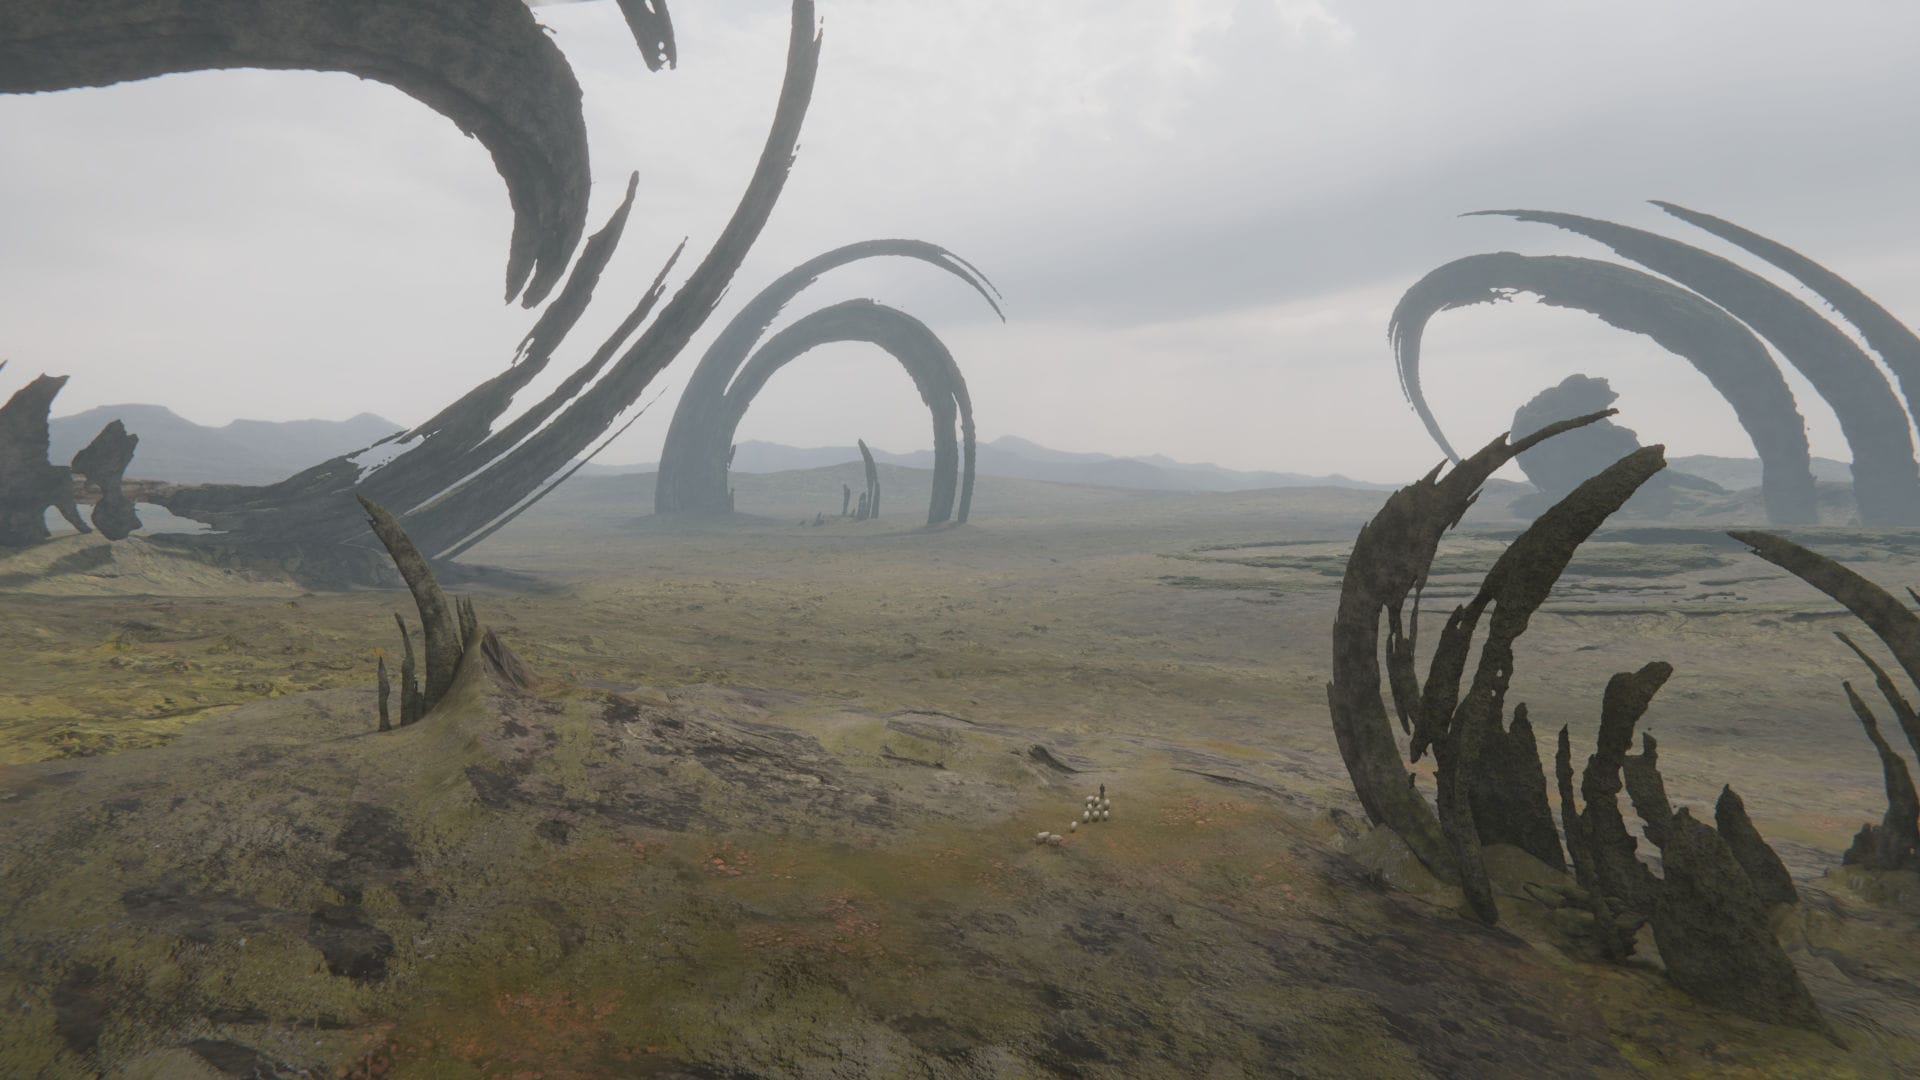
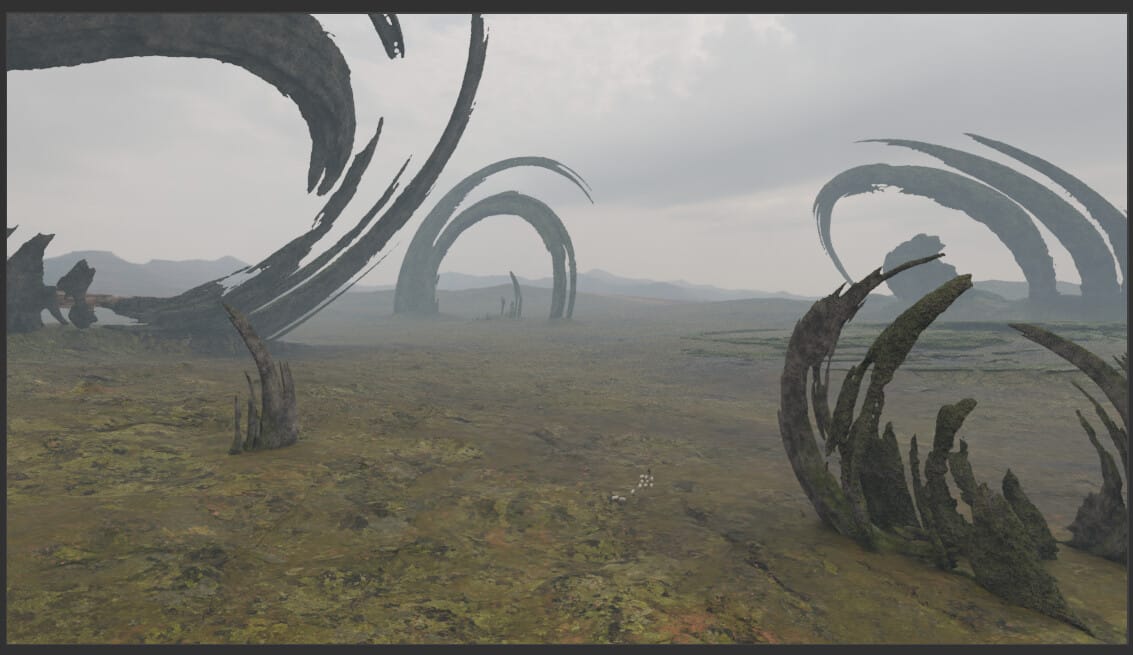
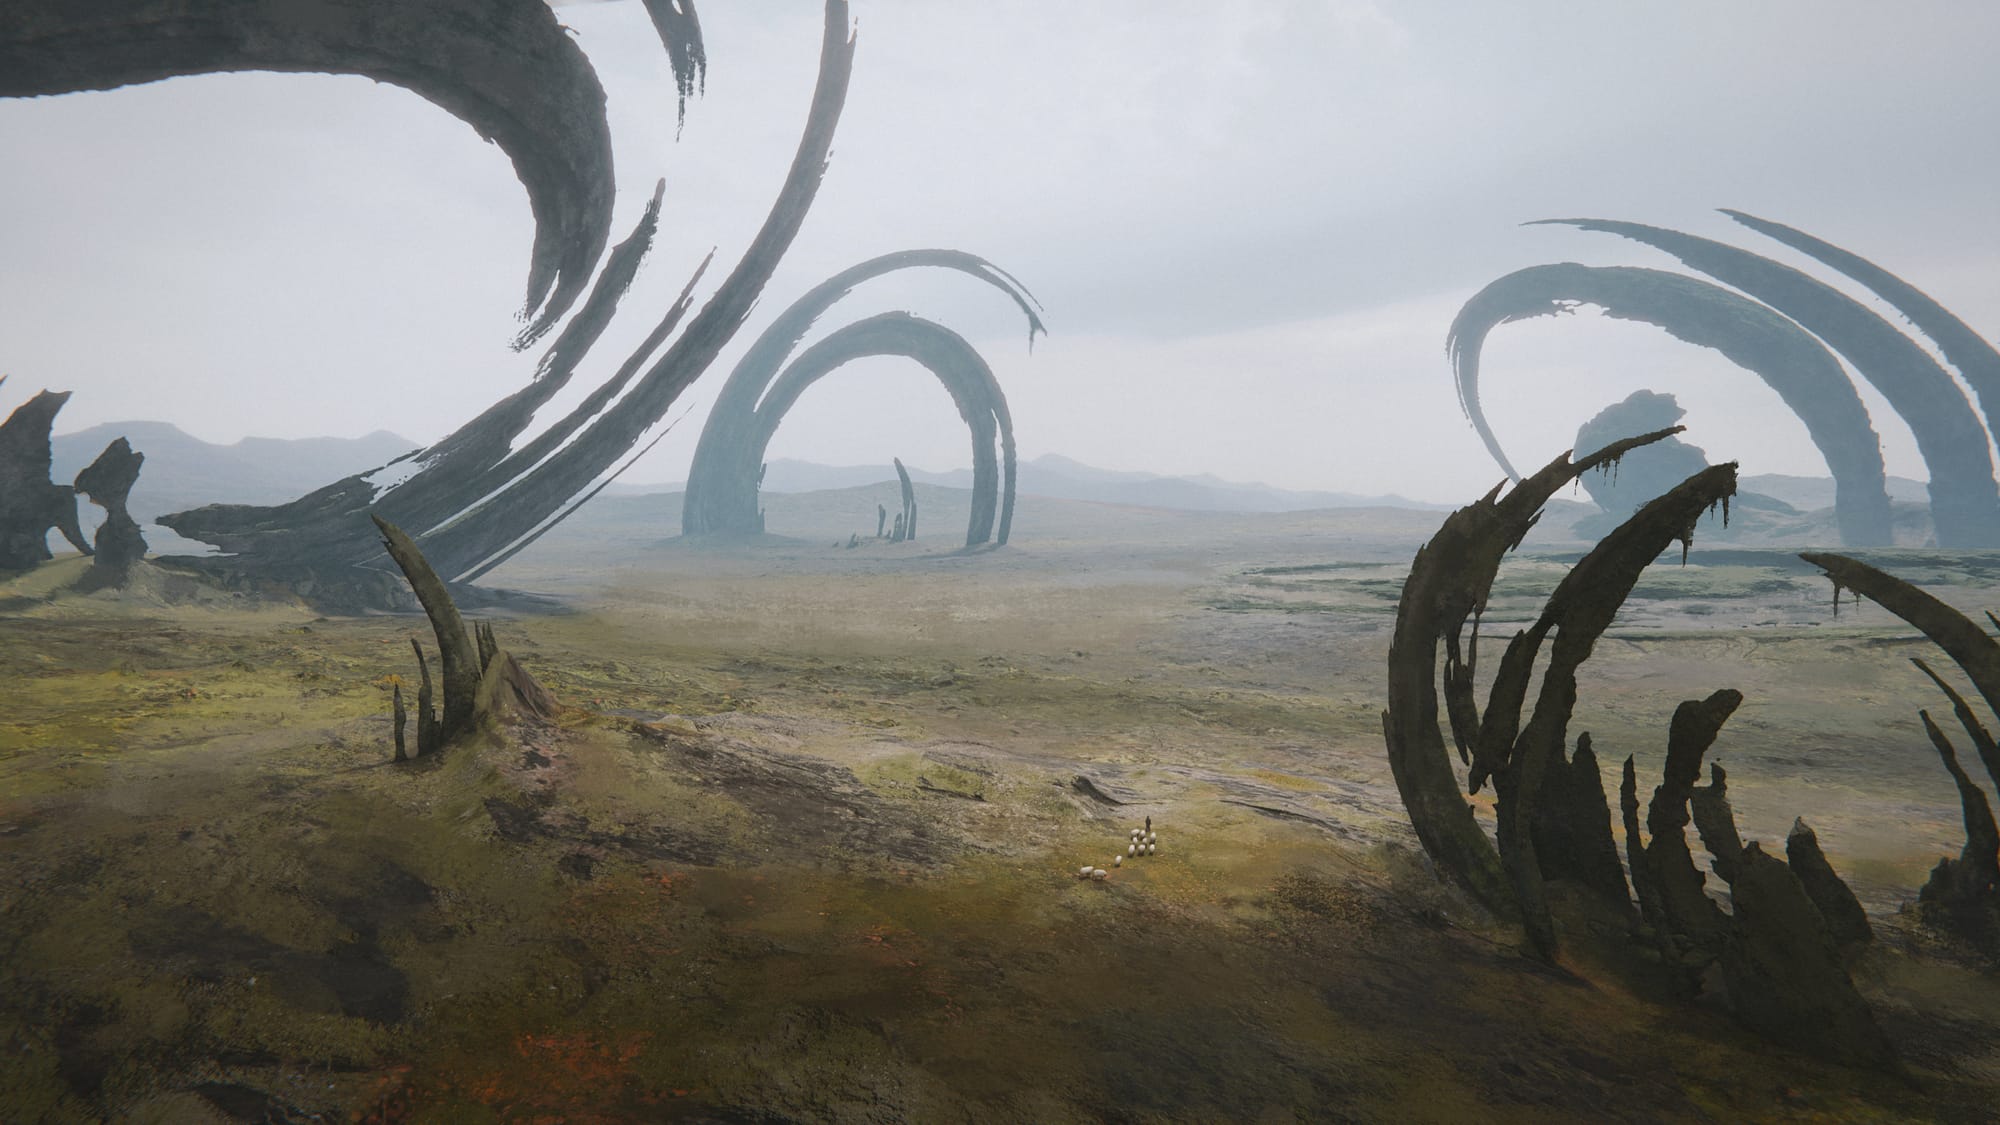
Behind the Scenes: Remnants of Earth’s first civilization

Eons before humanity walked on earth, another, long forgotten, civilization lived on this very planet. They have departed for the stars long ago. Now only their ruins remain, sustained by a technology that humanity won’t discover for millennia.
The artifacts were created with geometry nodes, the ground textures and the HDRI is from Polyhaven, and the matte painting effect was achieved by a simple paint-over in Affinity Photo.
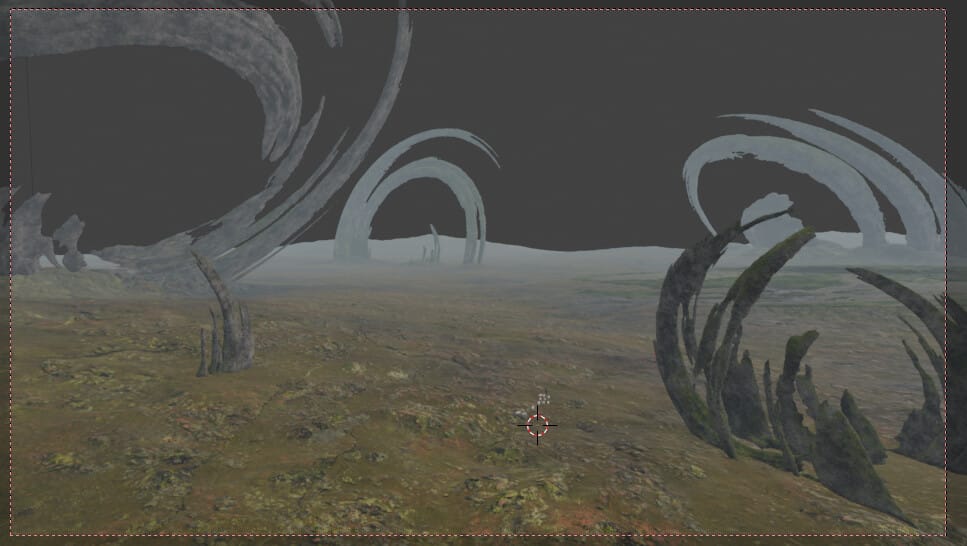
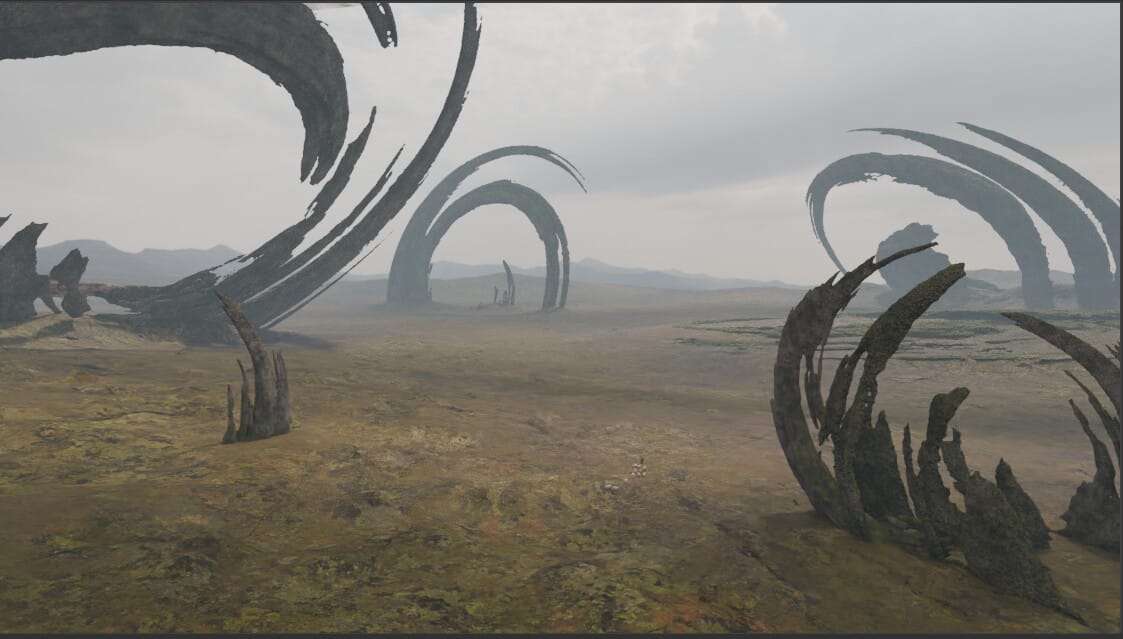
The raw render looked like this:
Breakdown
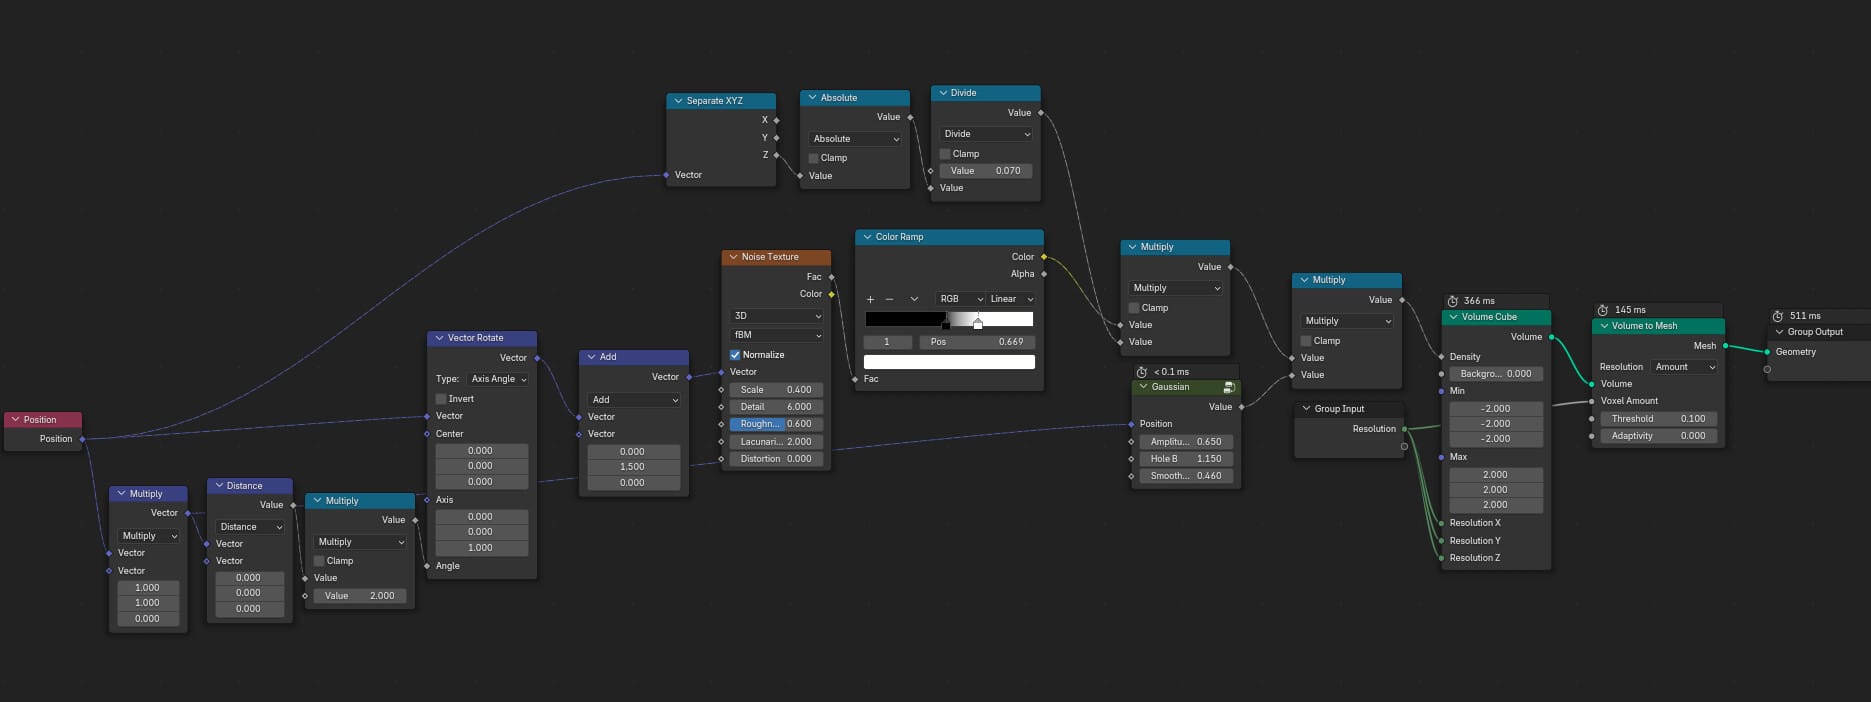
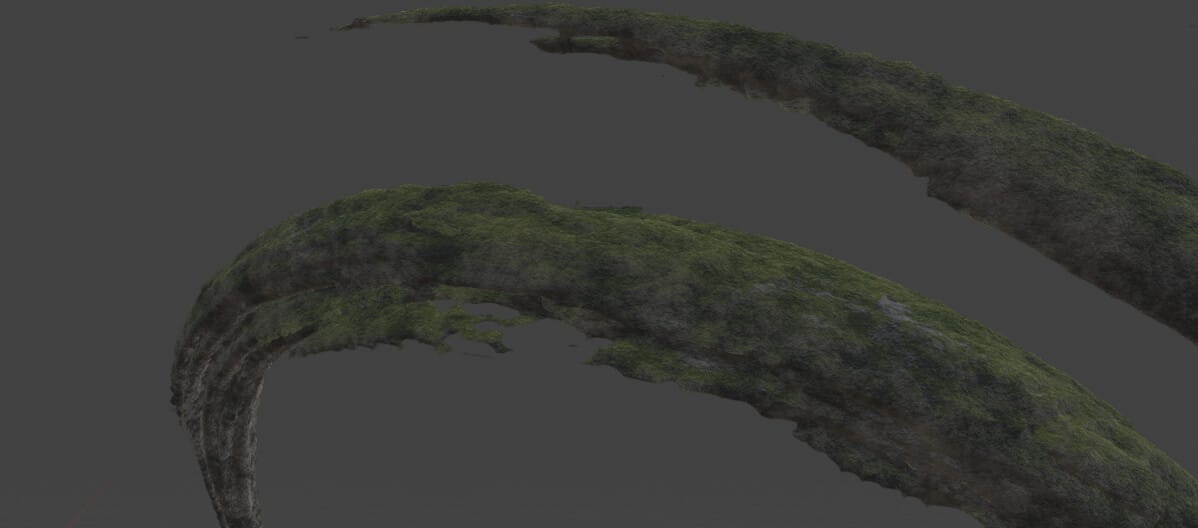
Step 1: Artifacts
I wanted to create something abstract procedurally, with the goal of it looking both very detailed and otherworldly. A rather easy way of getting intricate shapes is to use a volume in geometry nodes, drive its density with a random pattern or texture, and then convert it to a mesh. After some experimenting, I ended up with a pretty simple setup that uses a rotated noise texture and constrain it along the Z axis to make it flat, and a Gauss curve to constrain it to a cylindrical shape:
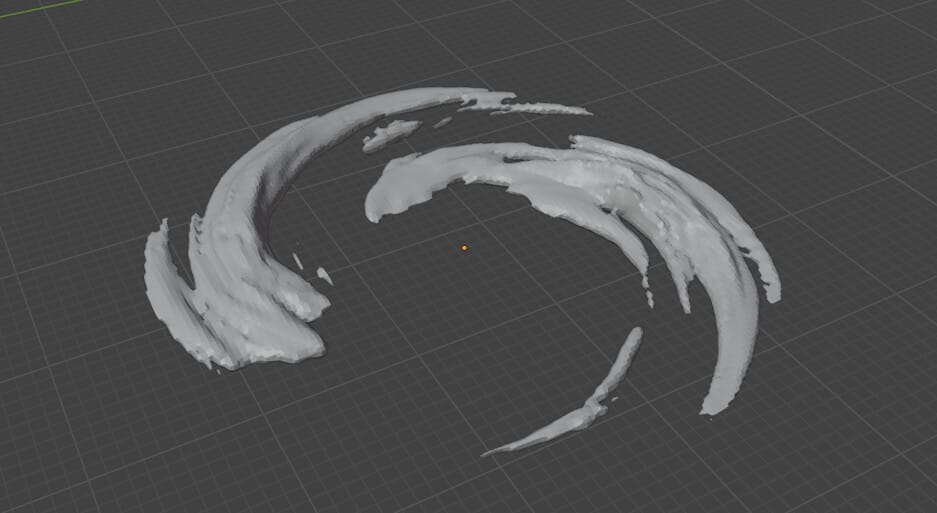
For the final artifacts in my scene I used a volume resolution of 250-300, which took 2-3 seconds to evaluate, and created just the right amount of mesh detail without blender crashing on me.
I applied the geo nodes modifiers and then removed the free floating parts of the mesh.
Note to self: always make sure to mark a geometry nodes group like this as “Fake User”, because otherwise it would be deleted once you apply all of the modifiers and thus don’t keep any active users of the node group in your scene.
As for the material: its about as simple as it gets; a noise texture, mixed with two different color gradients, and both gradients then mixed with a dot product between surface normal and Z vector to apply the moss only on top.
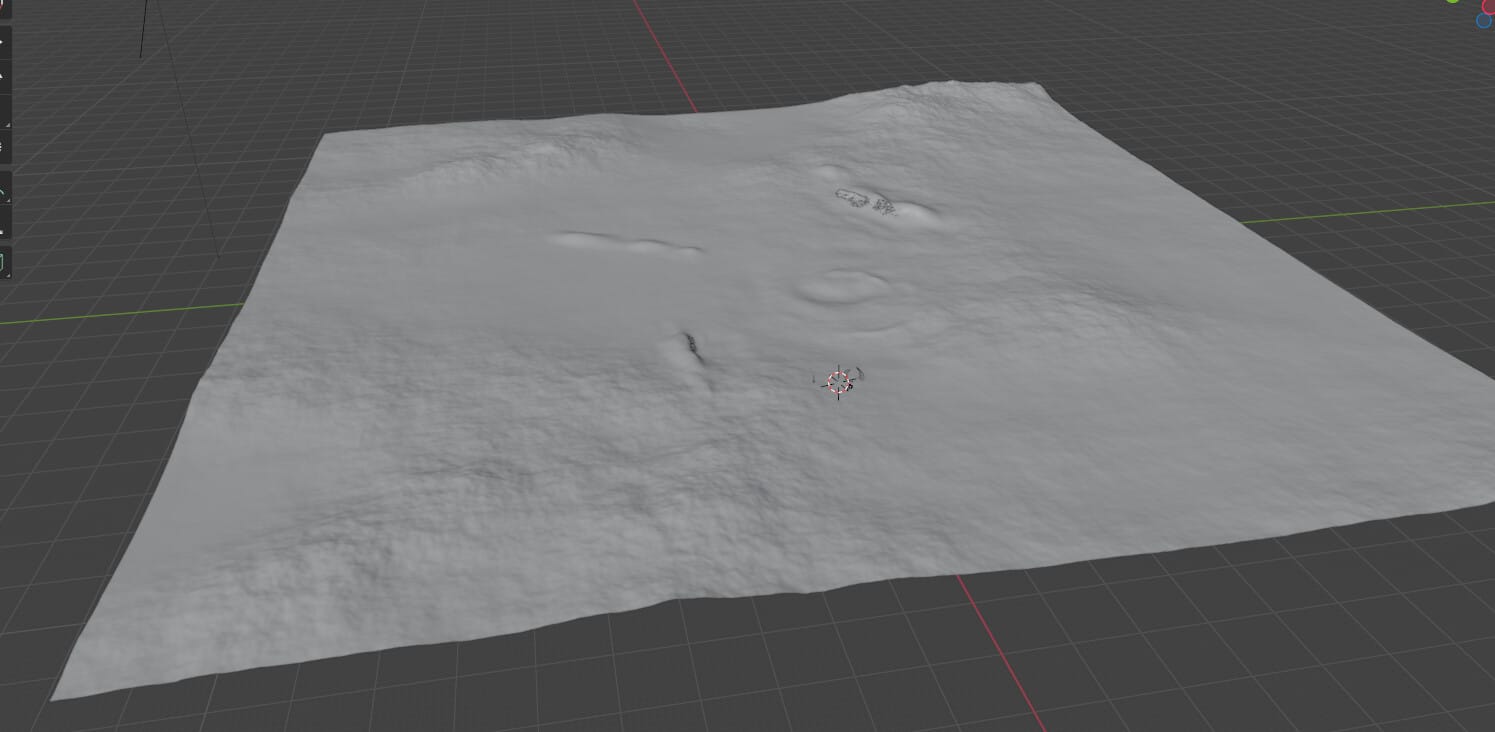
Step 2: The Landscape
Pretty unspectacular: the landscape was made with the A.N.T. addon. The important bit was to make it look huge. Which effectively meant I needed lots of small detail, and shouldn’t stretch it too far in the Z direction to get the feeling of rolling hills.
The material is a mix of three different PBR materials I grabbed from polyhaven.com, mixed together with a noise texture, and a mask created from the dot product of the surface’s normal vector with the Z vector to add more rock to the steeper areas of the landscape.
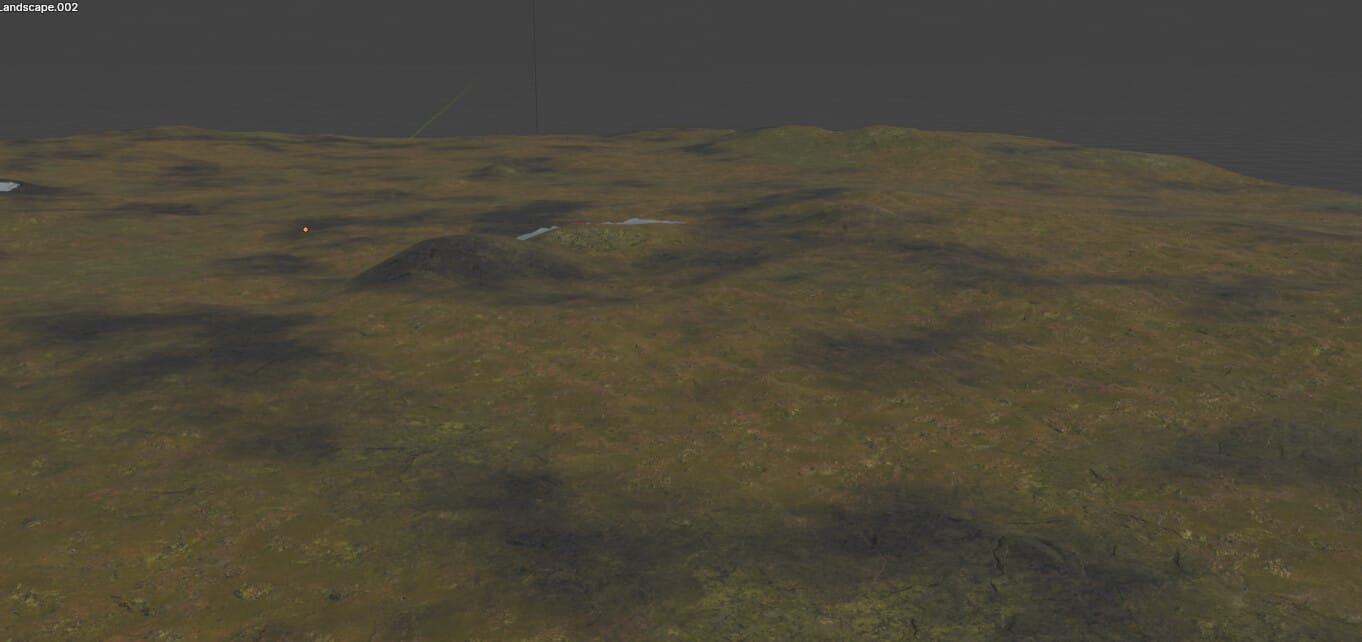
To prevent tiling, I used this little hack before the image textures:
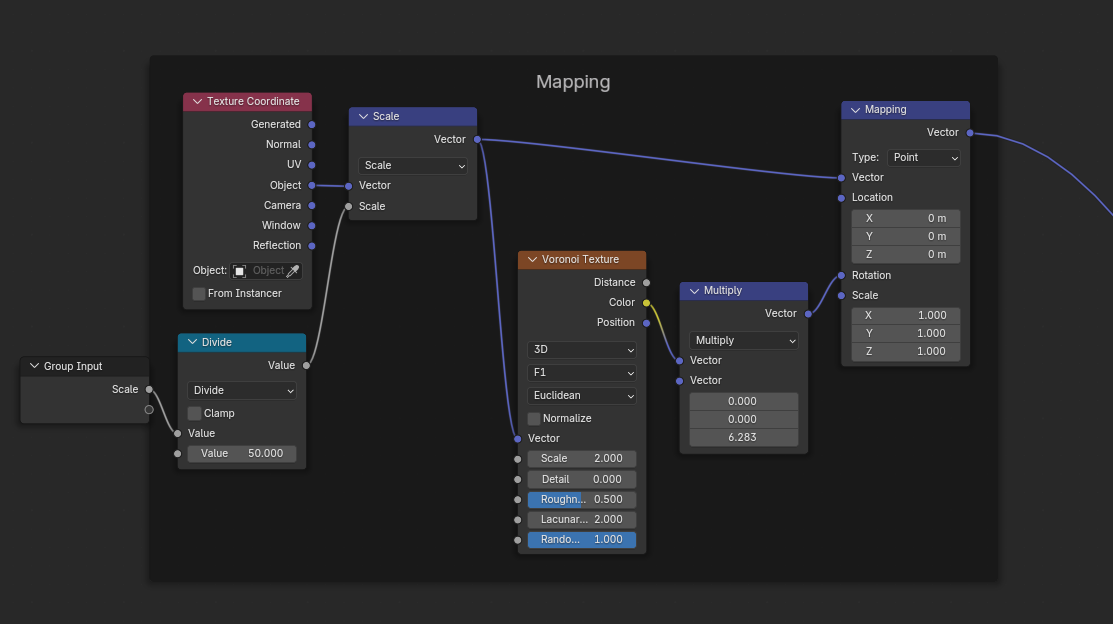
This creates little islands of the texture with random rotations per island. The seams were luckily not really noticeable (otherwise they would have needed to be broken up with another noise texture).
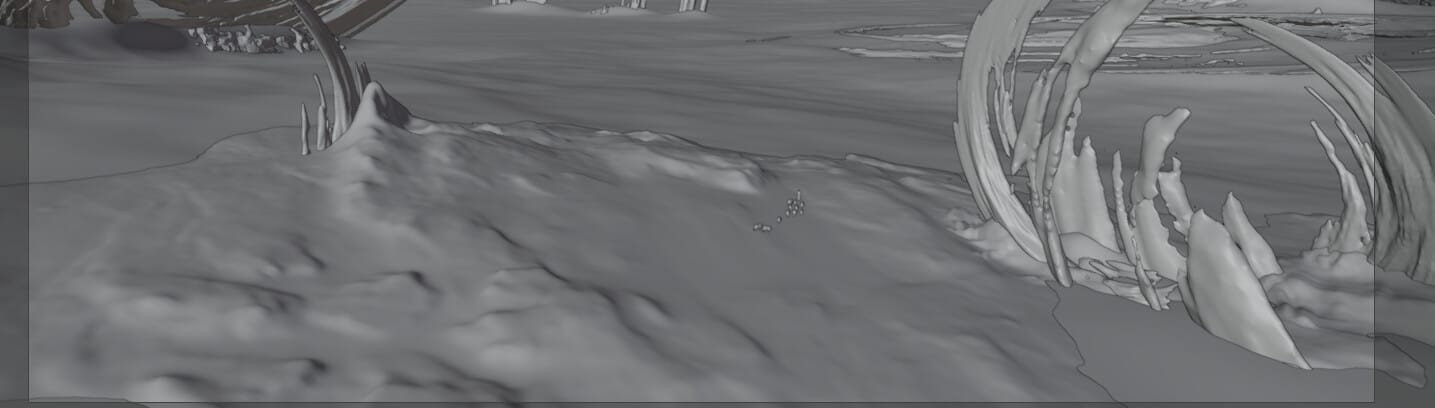
After I placed a fair amount of artifacts over the landscape, I went to sculpting small bumps into the landscape that would connect both, making it look like the artifacts have been buried for eons.

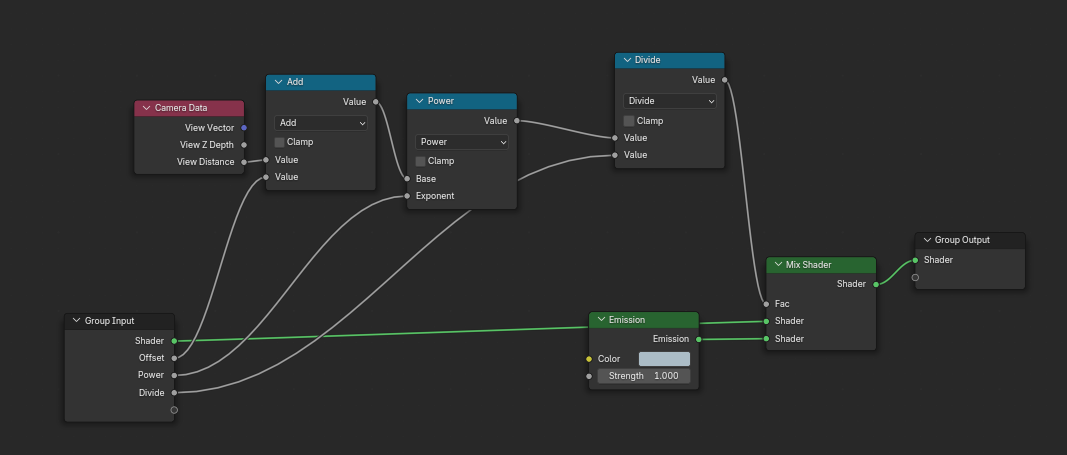
Step 3: volumetrics, but fake
What do you do when you want to achieve a certain effect but don’t feel like actually simulating it? You fake it. This was the case with the atmospheric haze. Luckily, Blender provides camera distance data, making it easy to create my own little node group that I appended to both the artifact and the landscape material:
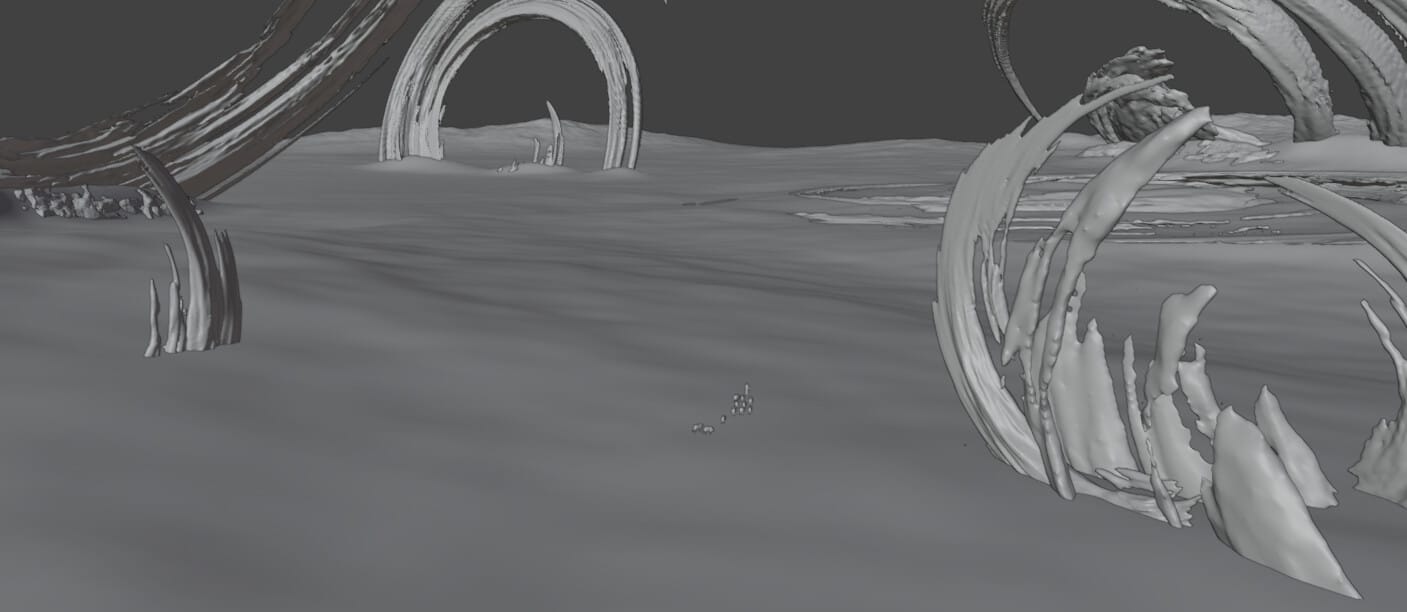
The result didn’t look too bad:
Step 4: something that draws the eye
What good is a large landscape if you can’t fathom how large it actually is? There’s an easy way of letting the viewer’s brain figure it out: you add a human. We humans are generally quite good at judging a human’s size and putting it in perspective.
Introducing: a handful of duplicated lowpoly sheep and a shepherd that’s simply a Blender base mesh, posed with the pose brush, and piece of cloth dragged over him with the cloth brush.
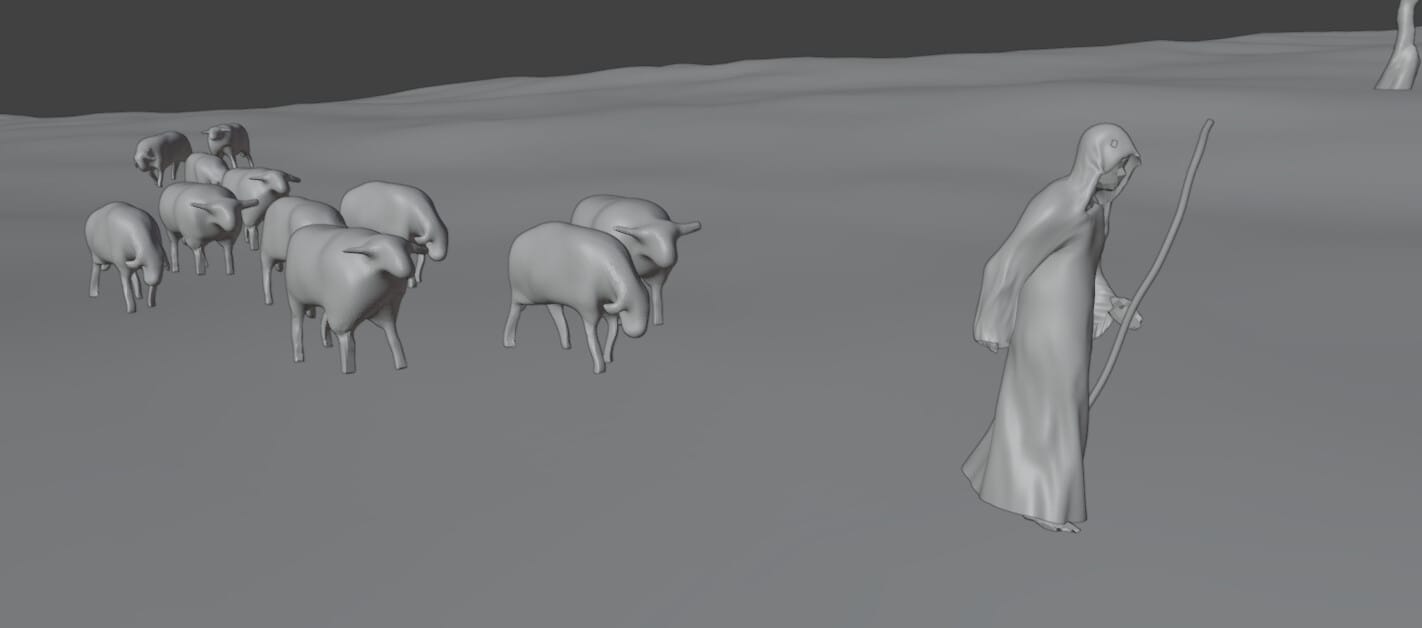
Goal achieved: tiny human, big landscape.
Step 5: Lighting
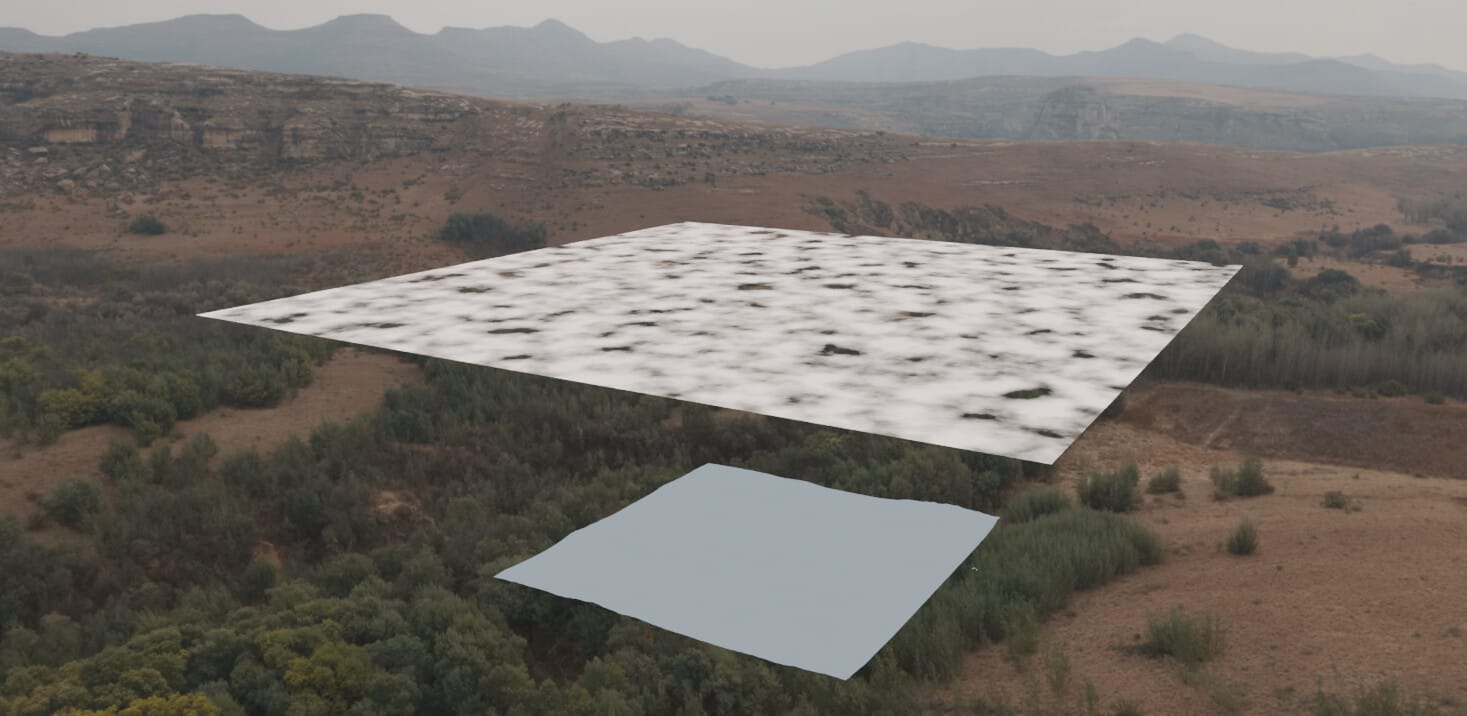
I found an HDRI on polyhaven.com that had just the right kind of rolling hills in the far distance that I needed, as well as the perfect overcast lighting:
But the landscape still felt rather dull overall. Then I realized: partially overcast weather means that you’ll get the occasional sun spot peaking through. And the bigger the landscape, the more sun spots there are.
And what’s the easiest way to create sun spots: with a sun lamp and something that casts a shadow. My “clouds” ended up being a big plane with a noise texture driving its transparency.
Well that looks better already:

But the foreground was still too bright and distracting. So I created another “cloud” plane, moved it closer to the foreground and played around with its position until I got just the right kind of natural vignetting that highlighted the shepherd and his flock of lowpoly sheep.
To make the foreground even more interesting, I modeled a few rock details onto a plane and put it in the foreground:
Post processing
With all the modeling and lighting done, it was time to move to the last stage of the pipeline. For this project, I had a kind of matte painting look in mind, which was something I hadn’t really tried before.
I opened up Affinity Photo, starting picking random dry brushes, sampled various colors from the underlying render and painted a couple of brush strokes over the landscape. Especially areas that I found too contrasty and needed subtler colors, or areas that looked too smooth (the dry brushes gave them a nice texture). I also added a few hanging vines to the closest artifacts.
After a few local curve adjustments to highlight either the shadows or the sun spots and a subtle LUT to tweak the overall colors, I ended up with the final image.
I also posted this breakdown over on Blenderartists.